The decision to do your own air duct cleaning is a good financial
choice; however mold removal products are primarily water and because of gravity will fall to the bottom of duct work fairly rapidly. Using a fogger that atomizes the solution will help propel the mold remover deeper into the system, but ultimately, only a professional air duct cleaner has the robotics needed to apply a mold killer 360 degrees deep inside duct work.
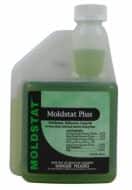
MoldSTAT Plus
Much of the time cleaning your own air ducts will be successful, because black mold typically forms at the registers and typically forms on the bottom of duct work where the moisture gathers.
Tools / Products needed
- MoldSTAT Plus Mold Removal
- Fogmaster Jr Mold Fogger or other sprayers
- Screwdriver
- Paper towels
- Plastic Garbage bags
- New furnace Filter
- Mixing bucket
Preparation
Determine the location of EVERY entrance to the heating system. This includes ceiling, floor and wall registers and the air returns. Odds are is a vent cover it leads to your heating ventilation air conditioning system. Each of these entry points will need to be removed. The air registers are the easy ones to locate, but don’t forget the air returns, these vents come in all shapes and sizes. For our purposes when we mention ‘vents’ it will mean to both Registers and Returns.
Locate the furnace filter access cover, and outside find the condenser unit.
Air Duct Mold Removal Steps
Turn off the HVAC system and blowers
During the initial application of the mold remover, all blowers should be off.
Prepare Mold Removal Solution
If using MoldSTAT Plus, mix 2oz for every gallon of water. Mix enough to fill your bucket and refill the jar as needed. The jar may empty between 10-30 minutes depending on the droplet size.
Fill the jar on the Fogmaster Jr, and adjust the spray to a fine mist. (note, MoldSTAT products are mixed with water and don’t product a smoke, they produce a fine mist)
When applying the mold remover, point the fogmaster at the surface, and allow the mist to gather, only to the point where is just starts to run. Ideally you want to soak to the moment just before it runs.
Clean EVERY vent (register & return)
1. Treat the vent cover
- On registers close the register first
- Apply the mold killer to the vent cover and surrounding area
- Wait 10 minutes ( You can apply to other vent covers while waiting)
- Wipe down the surface with paper towels
2. Remove vent cover
- Remove the screws holding the vent cover
- Place the vent cover upside down on a plastic bag
- Apply the mold killer to the back of vent cover
- Wait 10 minutes
- wipe down the surface with paper towels
3. Treat the duct work
Apply the mold killer to the inside of the duct directing the spray as deeply as possible. After 10 minutes, wiping down the inside of the duct is optional.
OPTION: On air returns, it is possible to run the system blower fan, to help pull the mold remover deeper into the system. Just remember to turn the blower off before applying to an air register (which would blow the mold remover back at you)
3. Replace the vent cover
Apply the mold killer to the inside of the duct directing the spray as deeply as possible
AirFilter Access
Remove the air filter, and any other covers. Apply Mold Killer to all available surfaces.
Outside Coils
Soak the outside coils with the MoldSTAT Plus mold remover.
Project wrap up
If the mold scent only comes from a couple vents, you could start by just treating those vents, and expand the project to the entire system if that doesn’t resolve the mold smell.
After DIY air duct mold removal if the mold problem doesn’t go away, you could either retreat or feel confident that the problem is truly larger than a DIY project, and hiring a air duct cleaning specialist is really necessary.
I used this